Scss/Sass编译器
在 终结符&生产式&文法 和 Lexer & Parser 介绍了实现编译器的部分前置知识。本文章主要是介绍如何实现一个 Scss/Sass编译器,里面包含 Lexer 、 Parser 、Scss转Css的Transform和生成Css代码的Code Generation。
Lexer
实现方案1 正则匹配
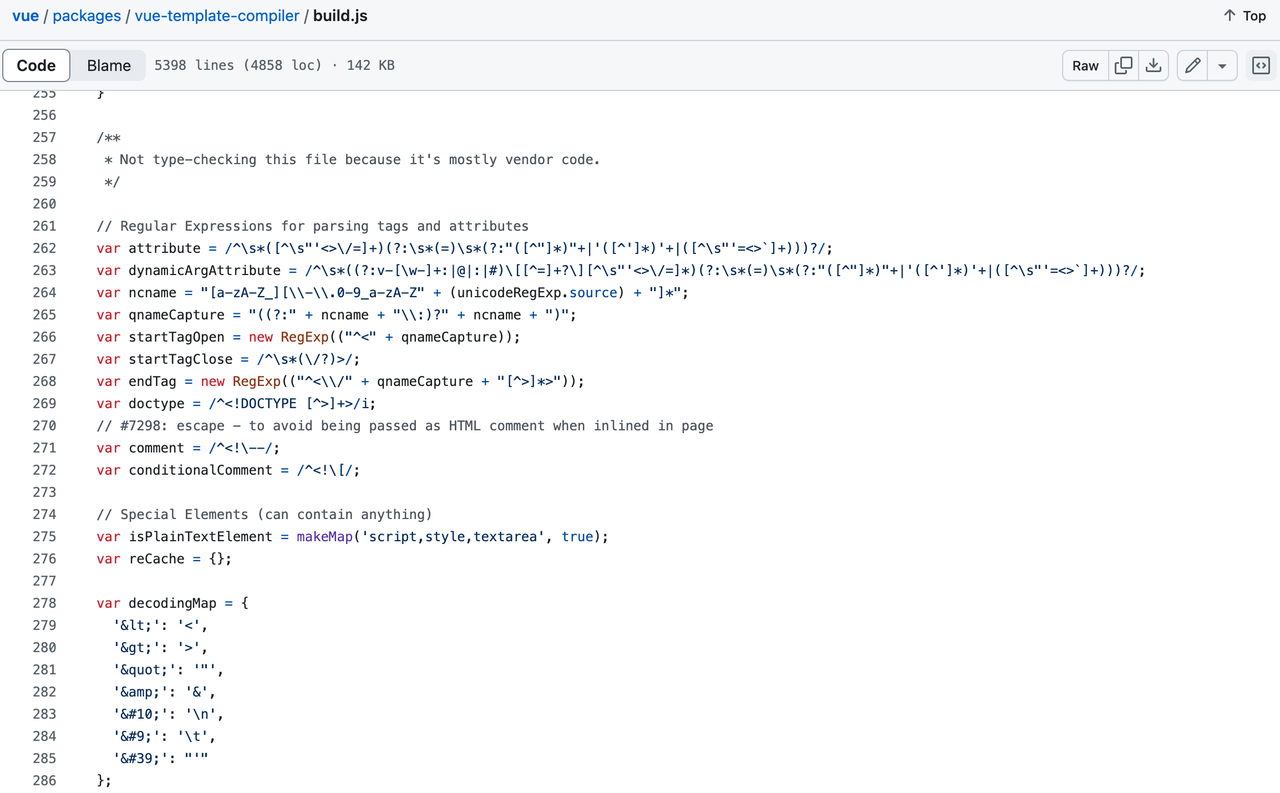
Lexer其中一种代码实现是使用正则匹配,但是由于Lexer相对复杂,使用正则很容易写得很长,变得可读性差,并且后期难以进行性能调优,例如下面Vue2的Lexer实现。
实现方案2 有限状态机
Vue3里面使用有限状态机替换了正则匹配进行改进,并且整体编译性能得到提升
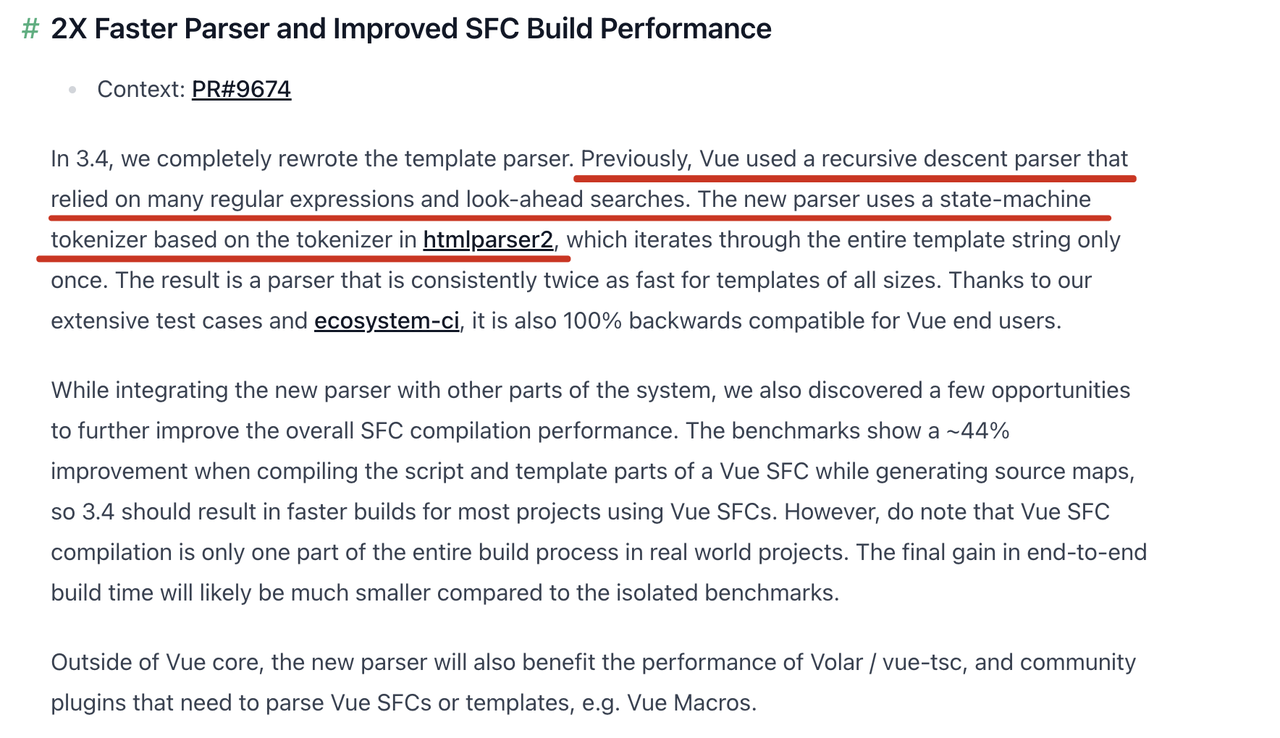 具体看 2x-faster-parser-and-improved-sfc build- performance,和 相关视频讲解
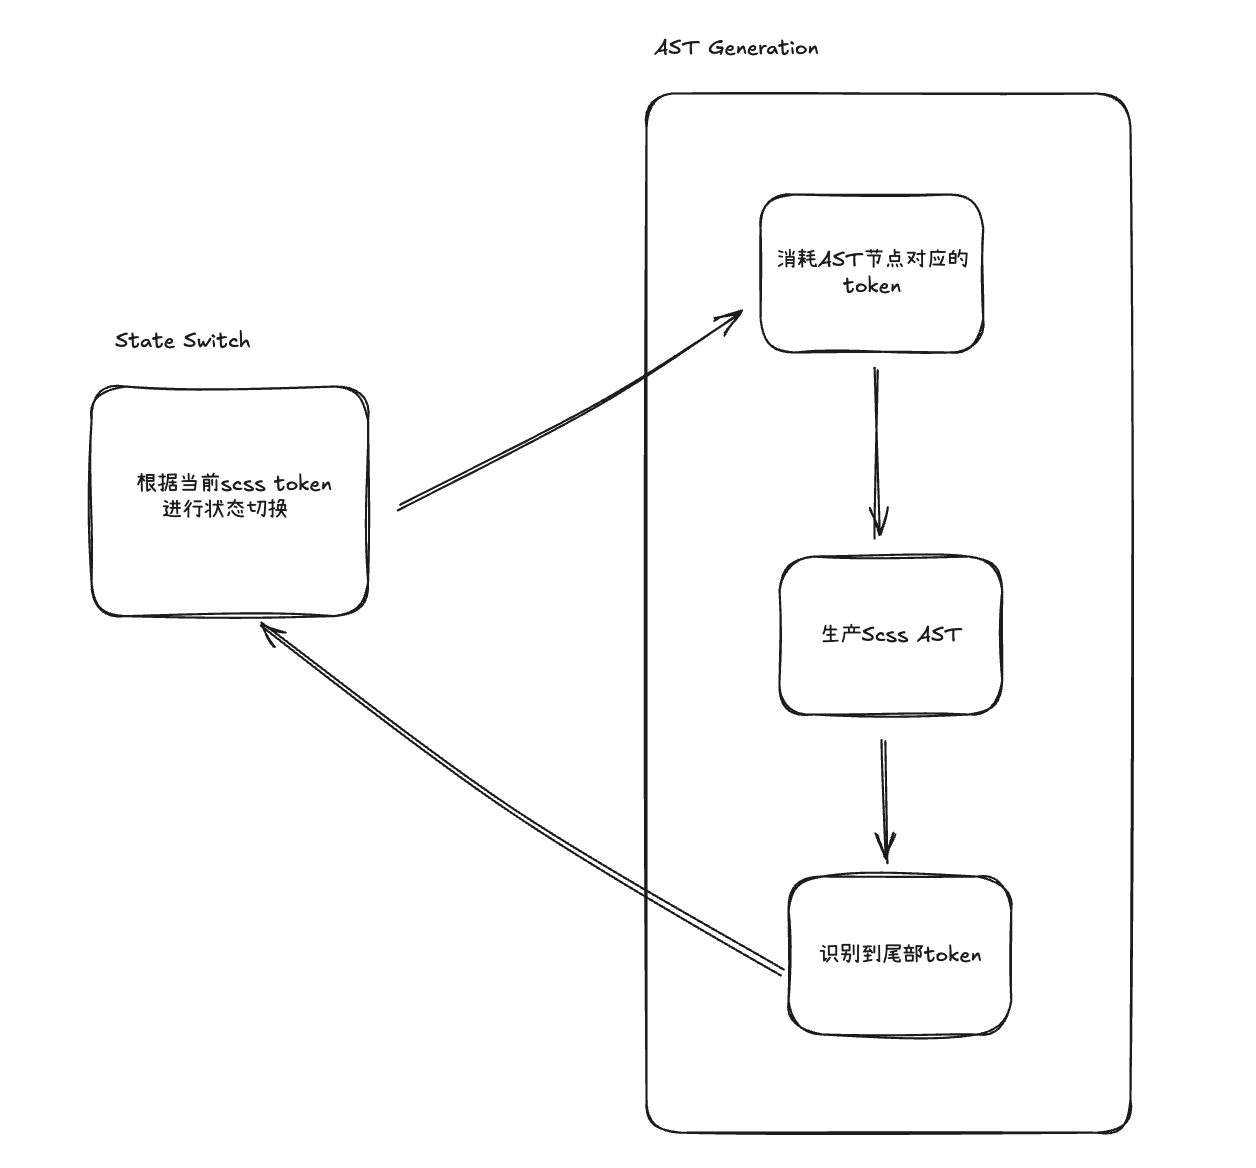
使用 有限状态机方式 去实现 Lexer ,根据匹配到的字符,进行不同状态之间的切换,并实现Token的提取。
_get_next_token() {
    while (this.current_char !== null) {
        if (this.current_char === ' ') {
            if (this.canSaveSpace()) {
                this.advance()
                return new Token(TokenType.space, ' ')
            } else {
                this.advance()
                continue
            }
        }
        if (this.current_char === '\n') {
            this.advance()
            continue
        }
        if (this.current_char === '@') {
            this.advance()
            return new Token(TokenType.mail, '@')
        }
        if (isChar(this.current_char)) {
            return this._id()
        }
        if (this.current_char === '$') {
            this.advance()
            return new Token(TokenType.dollar, '$')
        }
        if (this.current_char === ':' && this.peek() === '=') {
            this.advance()
            this.advance()
            return new Token(TokenType.assign, ':=')
        }
        if (this.current_char === ':') {
            this.advance()
            return new Token(TokenType.colon, ':')
        }
        if (this.current_char === ';') {
            this.advance()
            return new Token(TokenType.semi, ';')
        }
        if (isNumber(this.current_char)) {
            return new Token(TokenType.integer, this.integer())
        }
        if (this.current_char === '+') {
            this.advance()
            return new Token(TokenType.plus, '+')
        }
        if (this.current_char === '/') {
            this.advance()
            return new Token(TokenType.div, '/')
        }
        if (this.current_char === '*') {
            this.advance()
            return new Token(TokenType.mul, '*')
        }
        if (this.current_char === '(') {
            this.advance()
            return new Token(TokenType.lparen, '(')
        }
        if (this.current_char === ')') {
            this.advance()
            return new Token(TokenType.rparen, ')')
        }
        if (this.current_char === '{') {
            this.advance()
            return new Token(TokenType.lcurly, '{')
        }
        if (this.current_char === '}') {
            this.advance()
            return new Token(TokenType.rcurly, '}')
        }
        if (this.current_char === '.') {
            this.advance()
            return new Token(TokenType.dot, '.')
        }
        if (this.current_char === ',') {
            this.advance()
            return new Token(TokenType.comma, ',')
        }
        if (this.current_char === '-') {
            this.advance()
            return new Token(TokenType.middleLine, '-')
        }
        if (this.current_char === '&') {
            this.advance()
            return new Token(TokenType.and, '&')
        }
        if (this.current_char === '\'') {
            this.advance()
            return new Token(TokenType.quotationSingle, '\'')
        }
        throw new Error(`get next token: the char is illege: ${ this.current_char }`)
    }
    return new Token(TokenType.eof, null)
}
步进器
advance() {
    this.pos += 1
    if (this.pos > this.text.length - 1) {
        this.current_char = null
    } else {
        this.current_char = this.text[this.pos]
    }
}
功能是进行字符串的下标偏移,并获取当前下标指向的下标
peek
peek(posAdd = 1) {
    let peek_pos = this.pos + posAdd
    if (peek_pos > this.text.length - 1) {
        return null
    } else {
        return this.text[peek_pos]
    }
}
有些操作需要提前进行后序字符的判断,那么就可以使用peek函数
Token 生成
遇到空格的时候,需要判断该空格是否有意义,有意思的空格返回一个Token Type 为 space的Token
if (this.current_char === ' ') {
    if (this.canSaveSpace()) {
        this.advance()
        return new Token(TokenType.space, ' ')
    } else {
        this.advance()
        continue
    }
}
而\n,目前都是无意义的,可以直接步进器跳过
if (this.current_char === '\n') {
    this.advance()
    continue
}
对于token type为id,和integer的提取,需要进行连续的advance拼接,然后返回
if (isChar(this.current_char)) {
    return this._id()
}
if (isNumber(this.current_char)) {
    return new Token(TokenType.integer, this.integer())
}
Parser
Parser中文是语法分析,拿到Lexer的结果Tokens后,需要将Tokens转为AST,得到一棵具有语法含义的抽象语法树。
AST结构设计
scss
.a {
    color: red;
}
const AST = {
"type": "Program",
"children": [
{
"type": "SelectorExpression",
"content": {
"type": "Selector",
"content": {
"type": "Symbol",
"text": ".a"
}
},
"children": {
"type": "Block",
"list": [
{
"type": "Property",
"key": {
"type": "Symbol",
"text": "color"
},
"value": {
"type": "PropertyValue",
"content": {
"type": "Symbol",
"text": "red"
}
}
}
]
}
}
]
}先看基础的,最外层的的AST类型必定为Program,Program的构造器是
class Program {
    constructor() {
        this.type = 'Program'
        this.children = []
    }
}
其子元素是一个选择器节点,代表该选择器的具体信息
class SelectorExpression {
    constructor(content, children) {
        this.type = 'SelectorExpression'
        this.content = content
        this.children = children
    }
}
对于稍微复杂一点的表达式,也是差不多的,只是AST构造器稍微复杂一点
@mixin m {
  color: red;
}
.a {
    @include m;
}
const AST = {
"type": "Program",
"children": [
{
"type": "MixinExpression",
"head": {
"type": "Symbol",
"text": "m"
},
"paramList": {
"type": "ParamList",
"list": [
{
"type": "ParamDeclaration",
"content": {
"type": "DollarExpression",
"name": "c"
}
}
]
},
"block": {
"type": "Block",
"list": [
{
"type": "Property",
"key": {
"type": "Symbol",
"text": "color"
},
"value": {
"type": "PropertyValue",
"content": {
"type": "Var",
"name": "c"
}
}
}
]
}
},
{
"type": "SelectorExpression",
"content": {
"type": "Selector",
"content": {
"type": "Symbol",
"text": ".a"
}
},
"children": {
"type": "Block",
"list": [
{
"type": "IncludeExpression",
"content": {
"type": "CallFunction",
"funName": {
"type": "Symbol",
"text": "m"
},
"paramList": {
"type": "ParamList",
"list": [
{
"type": "ParamDeclaration",
"content": {
"type": "Symbol",
"text": "red"
}
}
]
}
}
}
]
}
}
]
}css
Css语法和Scss差不多,构造器比Scss简单,Css AST构造器
代码实现
eat函数
eat(token_type) {
     if (this.current_token.type === token_type) {
        this.current_token = this.lexer.get_next_token()
     } else {
        throw new Error(`eat error: ${ this.current_token }, expect token type ${ token_type }`)
     }
}
该函数是 Parser和Lexer之间的连接,用于进行Lexer的Tokens的获取,每次调用,都会把下标移动到下一个Token,并且每次获取Token之前,会对当前Token进行校验。
基本流程
expression_statement() {
  this.eat(TokenType.mail)
  if (this.current_token.type !== TokenType.id) {
      throw 'expression_statement error, the @ next token is not id'
   }
   if (this.current_token.value === ReservedKeyword.mixin) {
       this.eat(TokenType.id)
       this.eat(TokenType.space)
       let headAST = this.id_statement()
       let paramList = this.param_list_statement()
       this.eat(TokenType.lcurly)
       let block = this.statement_list()
       let blockAST = new Block(block)
       let node = new MixinExpression(headAST, paramList, blockAST)
       this.eat(TokenType.rcurly)
       return node
   }
 ...
例如,expression_statement这个状态函数专门用于处理@mixin、@if、@include 等@开头的表达式 具体的流程是这样的
- eat掉一开头的 TokenType.mail 邮件符Token
// eat掉开头的@
@mixin m {
  color: red;
}- mixin和后面的空格是固定的Token,也需要eat掉
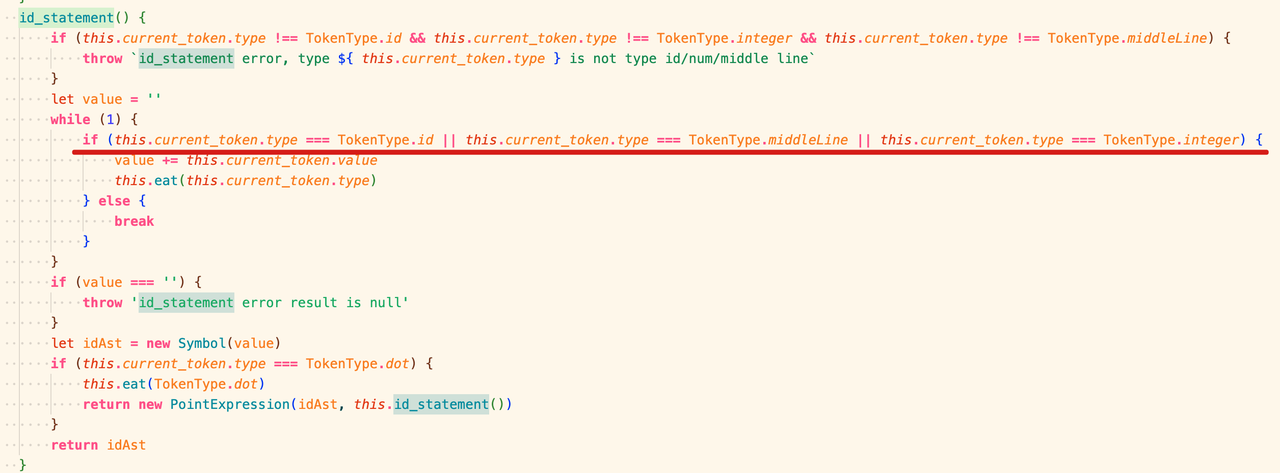
- 下面的m是一个AST type为Symbol的节点,使用 id_statement状态函数生成 可以看到id_statement函数会遍历三种Token Type,因为这三种Token Type都有可能组成Symbol节点的内容,直到没有这三种节点出现,就基本算结束,如果后面还有’.’,那么还需要进行PointExpression的生成,否则直接返回
 4. 继续回到expression_statement函数,下面是生成mixin的参数列表AST,起始结束符为(),和块状内容的AST,起始结束符为{}
expression_statement () {
    ...
    let paramList = this.param_list_statement()
    this.eat(TokenType.lcurly)
    let block = this.statement_list()
    let blockAST = new Block(block)
    ...
}
生成完mixin的所有内容后,就拼接成MixinExpression表达式AST进行返回。
Transform
由于scss最终生成的css,所以拿到scss的AST后,需要将其转为css的AST。
代码实现
我们直接看一个经典应用场景,变量声明和赋值
const test6 = function () {
    logTest('-------------------test6-----------------')
    let text = `$myColor: red;
.a {
    $myColor: blue;
    color: $myColor;
}`
    logTest('input:\n', text)
    let result = translater(text)
    logTest('result:\n', result)
    let expect = `.a {
    color: blue;
}`
    ensureEqual(expect, result, 'test6')
}
其scss AST对应如下
const AST = {
  "type": "Program",
  "children": [
    {
      "type": "Assign",
      "key": "myColor",
      "value": "red"
    },
    {
      "type": "SelectorExpression",
      "content": {
        "type": "Selector",
        "content": {
          "type": "Symbol",
          "text": ".a"
        }
      },
      "children": {
        "type": "Block",
        "list": [
          {
            "type": "Assign",
            "key": "myColor",
            "value": "blue"
          },
          {
            "type": "Property",
            "key": {
              "type": "Symbol",
              "text": "color"
            },
            "value": {
              "type": "PropertyValue",
              "content": {
                "type": "Var",
                "name": "myColor"
              }
            }
          }
        ]
      }
    }
  ]
}
查询Assign节点,获取该节点的变量名和变量值,在作用域上定义
visit_Assign(node) {
     let var_name = node.key
     this.scope.define(var_name, node.value)
}
接下来是visit_SelectorExpression,由于visit_SelectorExpression涉及到其他功能(后代选择器,群选择器等)处理,会比较复杂,但是对于当前测试用例,我们只需要关注前这两句就行,这两句会处理SelectorExpression的头部信息和内容,将其转为css AST的头部信息和内容。
visit_SelectorExpression(node) {
    let head = this.visit(node.content)
    let block = this.visit(node.children)
    ...
}
接下来进入了visit_Selector,这个测试用例比较简单,直接转成css AST即可
    visit_Selector(node) {
        let content = this.visit(node.content)
        return SelectorCss(TextCss(content))
    }
进入visit_Block,block是一个列表,分别处理列表里面的各个表达式,然后拼接成css AST返回
    visit_Block(node) {
        let l = []
        this.scope.add()
        node.list.forEach(e => {
            let r = this.visit(e)
            if (Array.isArray(r)) {
                l.push(...r)
            } else {
                l.push(r)
            }
        })
        this.scope.pop()
        let result = BlockCss(l)
        return result
    }
接下来又是一个Assign,并且声明的变量名也是一样
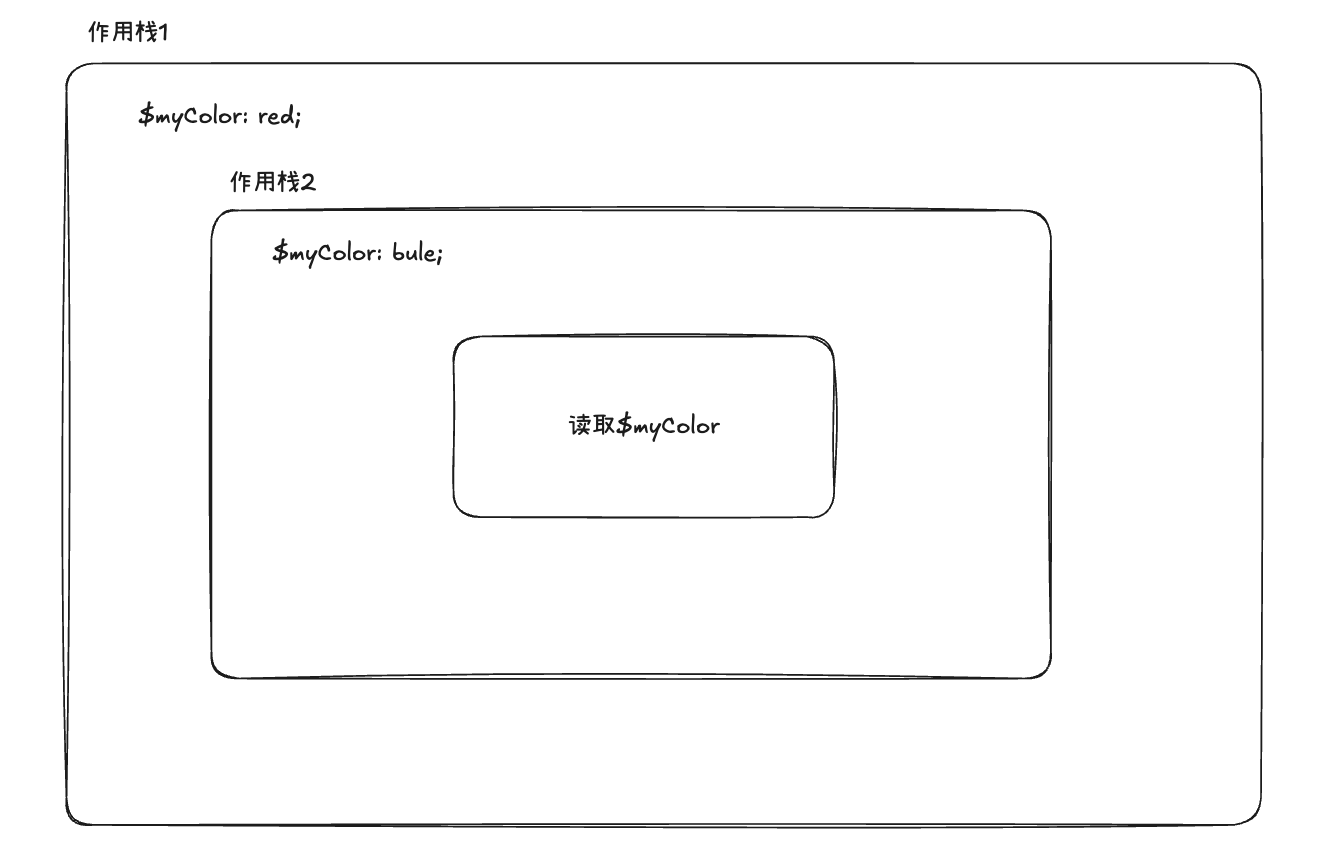
$myColor: red; // 第一次变量声明myColor
.a {
    $myColor: blue; // 第二次变量声明myColor
    color: $myColor;
}
这里就涉及到作用域栈的概念
class Scope {
    constructor() {
        this.stack = []
    }
    get lAST() {
        return this.stack[this.stack.length - 1]
    }
    define(key, value) {
        this.lAST[key] = value
    }
    pop() {
        this.stack.pop()
    }
    add() {
        this.stack.push({})
    }
    valueFromScope(key) {
        let i = this.stack.length - 1
        while (i >= 0) {
            let value = this.stack[i][key]
            if (value !== undefined) {
                return value
            }
            i--
        }
        return undefined
    }
}
每当进入一个块级作用域,都会增加一个作用域栈
this.scope.add()当块级作用域的内容处理完,需要推出栈
this.scope.pop()可以看出在该测试用例中,作用域栈的结构如下,读取变量从内往外找,优先读取到blue
拿到变量值后,就将其转为css到属性值,最后的结果是
const AST = {
  "type": "ProgramCss",
  "list": [
    {
      "type": "SelectorExpressionCss",
      "expression": {
        "type": "SelectorCss",
        "content": {
          "type": "TextCss",
          "value": ".a"
        }
      },
      "block": {
        "type": "BlockCss",
        "list": [
          {
            "type": "PropertyCss",
            "key": {
              "type": "TextCss",
              "value": "color"
            },
            "value": {
              "type": "TextCss",
              "value": "blue"
            }
          }
        ]
      }
    }
  ]
}
Code Generation
将Css AST生成Css字符串,具体代码实现
Sass to Scss
由于Scss的区别主要是一个使用{}作为块级作用域分界符,一个使用缩进作为分界符 由于差别比较单一,就直接用字符串处理转译了,具体代码实现
总结
完整编译器整体代码较为庞大,细节也比较多。限制于篇幅,本文章只是大致讲了其中比较关键的点,想熟练掌握编译器还是得通过多看书,多看相关项目源码,多练习的方式,像eslint、rollup、jsx等相关源码,都是很好的资料,并且这些都是实际工程,较好上手且学习完能直接应用。